A happy new year 2013
- A happy new year, everyone. I have witten this entry because I wrote the same title entry last year.
Review last year
Private
Our first baby was born at March first, and she has been ten months. She walks along the wall, and saids “Mamma”.
I stoped diet and temperance in the first half of last year, but I also resumed and ongoing.
I’m back to my parents’ house as soon as possible why health of my parent is not good.
My wife became ill after childbirth, she had surgrey in the hospital.
I and our daughter caught a cold from about Decenber, and we were in bed most of the time at the end of the holiday.
Work
I was scheduled to go home in mid-November. But I was nearly the last train back about one and a half months after the end of the work-at-home.
I made a first-time telecommuting when my wife was infected with norovirus.
The articles that we was interviewed were published, and I had written the official blog.
Our mission was changed building a new data center, my main mission is testing and developping and building authentication and mail systems, packages and SCM repository.
I packaged unofficial Debian packages at using free software and I developped softwares.
Debian and others
Blockdiag series had been main.
Other softwares were almost uploads to mentors.debian.net, but were not yet main.
We had held “Grand union Debian meeting” (大統一Debian勉強会).
I have said “Opening speech”, and photo shoot of the day, only.
I had become a Debian JP leader of this term, but I do not play a role in private is too busy.
Currently, I have not been able to work my maintenance of the Debian packages.
Activity of the CouchDB JP was stopped.
Programming and python, python & Debian packaging only I was doing in both public and private.
In summary, child-rearing, nursing my wife, to go home to the parents’ frequent were more difficult than expected.
This year
I decided two simply.
First health
Health break, we would spend all one’s time to it. Our daughter, my wife, myself are to stay healthy firstly.
In moderation
What I want to do, that I do not have a lot to do everything this year. Last year only become hands full health aspects of my family, there was a lot of what was untouched. So, I think it is not aiming for 100%, 50%, 0%, and 80%, 80%, 80% would aim a little luck.
GPT対応のpreseedの書き方
この記事は Debian/Ubuntu JP Advent Calendar 2012 の 12/14(金) の記事です。昨日は岩松さん(@iwamatsu)による “namecheck / 同じ名前のパッケージ/プロジェクト名がないか確認する” でした。今日は、GPTを使う、要は2TBを超えるハードディスクに、preseedを使ってDebian/Ubuntuをインストールする方法について紹介します。
GPTとは
GUIDパーティションテーブル(GUID Partition Table)の略で、EFIの一部であることから、rEFItを使ってIntel Mac、特にMacBookなどにDebianをインストールしている面々には聞きなれた用語かと思います。EFIはx86アーキテクチャのBIOSに、GPTはMBRを置き換えるものとなっています。MBRの場合、2TBの壁がありますが、最近のディスクの大容量化により、2TBを超えるディスクを持っている方も増えているのではないかと思います。
ちなみに我が家では、OpenBlockS 266で使用している40GBとか80GBの5400rpmの2.5インチハードディスクが大半で、普段つかっているMacBook Pro 15インチは120GBのSSD、一番大きい容量でもMac miniの500GBなので、2TBを超えるなんてまだ当面先の話です。
閑話休題。2TBを超えるディスクといえば、1Uサーバでもお目にかかるようになりました。今回、職場で導入するサーバの一部で、2TBを超えるサーバにpreseedでUbuntu 12.04 LTSをインストールすることになったので、説明したいと思います。
Preseedについて
Preseedでの書き方について触れる前に、そもそもPreseedって何ぞや、という方のために少し説明。PreseedはDebianおよびDebianから派生したディストロで使用される、自動インストールのための仕組みです。みんな大好きRHEL系のディストロではKickStartに相当するものです。Debian系ではKickStartを使ってPXEブートで自動インストールすることもできますが、できることに一部制限があるので、Preseedを使うのがよいでしょう。
preseedでのパーティショニング
公式ドキュメントの B.4.7. パーティション分割 に例が記述されています。細かく指定するには、”partman-auto/expert_recipe”を使うのですが、残念ながらこの指定方法について細かく載っているマニュアルは、ネットで検索してもなかなか出てきません。上記リンク先で説明のあるとおり、debian-installerパッケージに含まれる、/usr/share/doc/debian-installer/devel/partman-auto-recipe.txt.gzを読むのが良いでしょう。公式ドキュメントのサンプルでは、
# If not, you can put an entire recipe into the preconfiguration file in one
# (logical) line. This example creates a small /boot partition, suitable
# swap, and uses the rest of the space for the root partition:
#d-i partman-auto/expert_recipe string                         \
#      boot-root ::                                            \
#              40 50 100 ext3                                  \
#                      $primary{ } $bootable{ }                \
#                      method{ format } format{ }              \
#                      use_filesystem{ } filesystem{ ext3 }    \
#                      mountpoint{ /boot }                     \
#              .                                               \
#              500 10000 1000000000 ext3                       \
#                      method{ format } format{ }              \
#                      use_filesystem{ } filesystem{ ext3 }    \
#                      mountpoint{ / }                         \
#              .                                               \
#              64 512 300% linux-swap                          \
#                      method{ swap } format{ }                \
#              .
と記載されていますが、各パラメータについての説明はありません。これは、partman-auto-recipe.txtによると、
<limits>::=<minimal size>_<priority>_<maximal size>_<parted fs>
となっています。サイズはmegabytesもしくはディスク容量の割合(%)で指定することができます。minimal sizeは最小サイズを指定します。priorityは小さい値の方が優先度が高くなります。maximalサイズは割り当ての上限サイズを指定し、-1を指定すると無制限となります。parted_fsは割り当てるパーティションの種類です。
つまり、上記では、
/boot
最低40MB、最大100MBを割り当て
ext3ファイルフォーマット
優先度はもっとも高い
/
最低500MB、最大10^9MBを割り当て
ext3ファイルフォーマット
優先度もっとも低い
swap
最低64MB、最大メモリサイズの300%(3倍)のサイズを割り当て
swap領域
優先度は2番めに高い
ということになります。
GPT対応した書き方
GPTの場合、1MBのbiosgrubという領域が必ず必要になります。これを忘れると、preseedでの自動インストールの途中、パーティショニングのところで失敗してしまいます。また、$gptonly{ }というパラメータも必要になります。
d-i partman-auto/expert_recipe string \
32 32 32 free \
$gptonly{ } \
$primary{ } \
$bios_boot{ } \
method{ biosgrub } \
. \
boot-root :: \
300 50 300 ext4 \
$gptonly{ } \
$primary{ } $bootable{ } \
method{ format } format{ } \
use_filesystem{ } filesystem{ ext4 } \
mountpoint{ /boot } \
. \
500 10000 -1 ext4 \
$gptonly{ } \
method{ format } format{ } \
use_filesystem{ } filesystem{ ext4 } \
mountpoint{ / } \
. \
8192 512 8192 linux-swap \
$gptonly{ } \
$primary{ } \
method{ swap } format{ } \
.
上記での場合、1MBのbiosgrub領域、300MBの/boot、8GBのswap領域、そして残りはすべて / ファイルシステムになる、ということです。この辺は、 Re: GPT preseed [ almost solved ] に掲載されています。なお、2TB未満のシステムであってもこれはそのまま使えます。(もしかしたら、そのまま使えるのはUEFI対応の機器だけかも知れませんが、その点は未検証です。)
さあ、これでもう迷わず preseed でパーティショニングの一番面倒な設定部分を書けるようになりましたね。おめでとうございます。
さーて、明日のAdvent Calendarは?
さあ、誰なんでしょうね。俺にも書かせろ、という方はぜひAdvent Calendarに参加してみてください。
See also
Rename project on GitLab
If you want rename project on GitLab, I think you will do it as following.
move “Project home”
“Edit”
Change “Project name”
“Save”
But you cannot change path of remote repository in this way. If you will change path, you take a next method.
Create new project.
Change local repository.
git push
But you cannot port existed issues on GitLab 3.1. So you must change data with SQL directly.
$ mysql -u root -p gitlabhq_production
mysql> select id, name from projects;
+----+------------------------+
| id | name                   |
+----+------------------------+
(snip)
| 35 | test-project           |
(snip)
| 39 | prod-project           |
+----+------------------------+
29 rows in set (0.00 sec)

mysql> select project_id from issues where project_id = '35';
+------------+
| project_id |
+------------+
|         35 |
|         35 |
|         35 |
|         35 |
|         35 |
|         35 |
|         35 |
+------------+
7 rows in set (0.00 sec)

mysql> update issues set project_id = '39' where project_id = '35';
Query OK, 7 rows affected (0.03 sec)
Rows matched: 7  Changed: 7  Warnings: 0
LDAP of the python, by the python, and for the python
The title is a joke. :)
Usually, LDAP is controlled by LDIF and ldap-utils; ldapsearch, ldapadd, ldapmodify, etc. But I dislike to control many and variety data with LDIF and these tools because it is a very bother to generate LDIF. To control LDAP will be easier by programming with python-ldap. “python-ldap provides an object-oriented API to access LDAP directory servers from Python programs”. In this article I describe basic usage of python-ldap for search, add, modify, delete.
Intall python-ldap
python-ldap is provided as Debian package.
$ sudo apt-get install python-ldap
Connect to LDAP server
To connect to LDAP server in the following conditions, as described below.
URI
rootDN
cn=admin,dc=example,dc=org
method
simple bind
>>> import ldap
>>> uri = "ldap://ldap.example.org"
>>> l = ldap.initialize(uri)
>>> rootdn = "cn=admin,dc=example,dc=org"
>>> password = "xxxxxxxx"
>>> method = ldap.AUTH_SIMPLE
>>> l.bind(rootdn, password, method)
1
Search
To search with filter is following.
search base
ou=People,dc=example,dc=org
search scope
subtree
search filter
‘(uid=*)’
>>> search_base = 'ou=People,dc=example,dc=org'
>>> search_scope = ldap.SCOPE_SUBTREE
>>> search_filter = '(uid=*)'
>>> l.search_s(search_base, search_scope, search_filter)
[('uid=nanashigonbeh,ou=People,dc=example,dc=org', {'cn': ['gonbeh'], 'objectClass': ['top', 'inetOrgPerson', 'posixAccount'], 'userPassword': ['{SSHA}M6H0rX2tGCwf6jBcgdP2hxSRisVoY55b=='], 'uidNumber': ['99999'], 'gidNumber': ['10000'], 'sn': ['nanashi'], 'homeDirectory': ['/home/nanashigonbeh'], 'mail': ['nanashigonbeh@net.example.org'], 'uid': ['nanashigonbeh']}), ('uid=nenashigonsaku,ou=People,dc=example,dc=org', {'cn': ['gonsaku'], 'objectClass': ['top', 'inetOrgPerson', 'posixAccount'], 'userPassword': ['{SSHA}M6H0rX2tGCwf6jBcgdP2hxSRisVoY55b=='], 'uidNumber': ['99998'], 'gidNumber': ['10000'], 'sn': ['nenashi'], 'homeDirectory': ['/home/nenashigonsaku'], 'mail': ['nenashigonsaku@net.example.org'], 'uid': ['nenashigonsaku']}), ('uid=yamadataro,ou=People,dc=example,dc=org', {'cn': ['taro'], 'objectClass': ['top', 'inetOrgPerson', 'posixAccount'], 'userPassword': ['{SSHA}M6H0rX2tGCwf6jBcgdP2hxSRisVoY55b=='], 'uidNumber': ['99997'], 'gidNumber': ['10000'], 'sn': ['yamada'], 'homeDirectory': ['/home/yamadataro'], 'mail': ['yamadataro@com.example.org'], 'uid': ['yamadataro']}), ('uid=tanakajiro,ou=People,dc=example,dc=org', {'cn': ['jiro'], 'objectClass': ['top', 'inetOrgPerson', 'posixAccount'], 'userPassword': ['{SSHA}M6H0rX2tGCwf6jBcgdP2hxSRisVoY55b=='], 'uidNumber': ['99996'], 'gidNumber': ['10000'], 'sn': ['nanaka'], 'homeDirectory': ['/home/tanakajiro'], 'mail': ['tanakajiro@com.example.org'], 'uid': ['tanakajiro']})]
Format of result is following.
[
    ('dn', {
        'attribute': ['value'],
        'attribute': ['value', 'value', 'value'],
        (snip)
        'attribute': ['value']
        }),
    ('dn', {
        'attribute': ['value'],
        'attribute': ['value', 'value', 'value'],
        ...
        'attribute': ['value']
        }),
    (snip)
]
This format is enable to use for other processing.
Add
Firstly, you must use ldap.modlist.addModlist(). addModlist() convert dictionary into list of tuple.
>>> result = l.search_s(search_base, search_scope, search_filter)
>>> result[0][1]
{'cn': ['gonbeh'], 'objectClass': ['top', 'inetOrgPerson', 'posixAccount'], 'userPassword': ['{SSHA}M6H0rX2tGCwf6jBcgdP2hxSRisVoY55b=='], 'uidNumber': ['99999'], 'gidNumber': ['10000'], 'sn': ['nanashi'], 'homeDirectory': ['/home/nanashigonbeh'], 'mail': ['nanashigonbeh@net.example.org'], 'uid': ['nanashigonbeh']}
>>> import ldap.modlist
>>> data_l = ldap.modlist.addModlist(result[0][1])
>>> data_l
[('cn', ['gonbeh']), ('objectClass', ['top', 'inetOrgPerson', 'posixAccount']), ('userPassword', ['{SSHA}M6H0rX2tGCwf6jBcgdP2hxSRisVoY55b==']), ('uidNumber', ['99999']), ('gidNumber', ['10000']), ('sn', ['nanashi']), ('homeDirectory', ['/home/nanashigonbeh']), ('mail', ['nanashigonbeh@net.example.org']), ('uid', ['nanashigonbeh'])]
Override values of “uid”, “sn”, “cn”, “uidNumber”, “homeDirectory”, “mail” as like folloing.
>>> user = result[0][1].copy()
>>> user['uid'] = ['foobar']
>>> user['sn'] = ['foo']
>>> user['cn'] = ['bar']
>>> user['uidNumber'] = ['123456']
>>> user['homeDirectory'] = ['/home/foobar']
>>> user['mail'] = ['foobar@example.org']
>>> user
{'cn': ['bar'], 'objectClass': ['top', 'inetOrgPerson', 'posixAccount'], 'userPassword': ['{SSHA}M6H0rX2tGCwf6jBcgdP2hxSRisVoY55b=='], 'uidNumber': ['123456'], 'gidNumber': ['10000'], 'sn': ['foo'], 'homeDirectory': ['/home/foobar'], 'mail': ['foobar@example.org'], 'uid': ['foobar']}
Convert with addModlist().
>>> user_l = ldap.modlist.addModList(user)
>>> user_l
[('cn', ['bar']), ('objectClass', ['top', 'inetOrgPerson', 'posixAccount']), ('userPassword', ['{SSHA}M6H0rX2tGCwf6jBcgdP2hxSRisVoY55b==']), ('uidNumber', ['123456']), ('gidNumber', ['10000']), ('sn', ['foo']), ('homeDirectory', ['/home/foobar']), ('mail', ['foobar@example.org']), ('uid', ['foobar'])]
To add data is necessary to use add_s() with dn and list of data. When it is succeed to add, the response is “(105, [])”. “105” is tag of adding.
>>> dn = result[0][0]
>>> dn
'uid=nanashi_gonbeh,ou=People,dc=example,dc=org'
>>> dn = 'foobar,ou=People,dc=example,dc=org'
>>> l.add_s(dn, user_l,)
(105, [])
Compare and modify
To detect changed data, use compare_s(). To need to prepare below data. First argument is dn, second argument is attribute name, third argument is value (value is not list).
Compare
>>> user2 = result[0]
>>> user2[1]['userPassword']
['{SSHA}M6H0rX2tGCwf6jBcgdP2hxSRisVoY55b==']
>>> password = '{SSHA}Z7H50qdkcYdH+8ghga6MCevOSa8ax3xp'
>>> userdn2 = user2[0]
>>> l.compare_s(userdn2, 'userPassword', user2[1].get('userPassword')]
0
>>> l.compare_s(userdn2, 'userPassword', password)
1
0 is not changed, 1 is changed. When result of compare_s() is “1”, I’ll use data for modify.
Modify
We must use ldap.modlist.modifyModlist() to modify data. First argument is current data without dn, second argument is new data without dn.
>>> mod_info_l = ldap.modlist.modifyModlist(current_dict, new_dict)
>>> mod_info_l
[(1, 'userPassword', None), (0, 'userPassword', ['{SSHA}Z7H50qdkcYdH+8ghga6MCevOSa8ax3xp'])]
If multiple attributes are changed as like following,
>>> ldap.modlist.modifyModlist(current, new)
[(1, 'cn', None), (0, 'cn', ['bar']), (1, 'uidNumber', None), (0, 'uidNumber', ['123456']), (1, 'sn', None), (0, 'sn', ['foo']), (1, 'homeDirectory', None), (0, 'homeDirectory', ['/home/foobar']), (1, 'mail', None), (0, 'mail', ['foobar@example.org']), (1, 'uid', None), (0, 'uid', ['foobar'])]
modify with modify_s() using data that specified with dn and modlist data. When It is succeed to modify, the result is “(103, [])”. “103” is tag of modify.
>>> l.modify_s(dn, mod_info_l)
(103, [])
Delete
Delete is specified dn only.
>>> l.delete_s(dn)
(107, [], 12, [])
“107” is tag of delete. “12” is sequence number of registered ldap object.
See also
Access to RSA SecurID token with Cisco ASA VPN using OpenConnect
What client do you use for access to Cisco ASA SSL VPN in your Debian system? It is usually to use Cisco AnyConnect, but we can use Debian package of OpenConnect. OpenConnect is a client for Cisco’s AnyConnect SSL VPN.
Install “openconnect” package.
$ sudo apt-get install openconnect
When use Cisco ASA without RSA SercurID token, follow next commands. It is using option “–no-cert-check” In this case, because we have not yet prepared signed by trusted Certificate Authority.
$ sudo openconnect --no-cert-check --user=user --passwd-on-stdin https://vpn.example.org/test_group

[sudo] password for user:

Attempting to connect to vpn.example.org:443
SSL negotiation with vpn.example.org
Server certificate verify failed: self signed certificate
Connected to HTTPS on vpn.example.org
GET https://vpn.example.org/test_group
Got HTTP response: HTTP/1.0 302 Temporary moved
SSL negotiation with vpn.example.org
Server certificate verify failed: self signed certificate
Connected to HTTPS on vpn.example.org
GET https://vpn.example.org/+webvpn+/index.html
POST https://vpn.example.org/+webvpn+/index.html
Please enter your username and password.
Password:
POST https://vpn.example.org/+webvpn+/index.html
Got CONNECT response: HTTP/1.1 200 OK
CSTP connected. DPD 30, Keepalive 20
Connected tun0 as 192.0.2.10 + 2001:0db8::10, using SSL
DTLS handshake failed: 2
DTLS handshake failed: 2
(snip)
When using Cisco ASA with two factor authentication as RSA SecurID token and LDAP authentication, openconnect command is following.
$ sudo openconnect --no-cert-check https://vpn.example.org/test_rsa
Attempting to connect to vpn.example.org:443
SSL negotiation with vpn.example.org
Server certificate verify failed: self signed certificate
Connected to HTTPS on vpn.example.org
GET https://vpn.example.org/test_rsa
Got HTTP response: HTTP/1.0 302 Temporary moved
SSL negotiation with vpn.example.org
Server certificate verify failed: self signed certificate
Connected to HTTPS on vpn.example.org
GET https://vpn.example.org/+webvpn+/index.html
Firstly, RSA SecurID token without PIN code. The former pair of username and passcode is SecureID token, the latter pair is LDAP authentication.


Please enter your username and password.
Username:user
PASSCODE:
Username:user
PASSCODE:
POST https://vpn.example.org/+webvpn+/index.html
Set new PIN code. Don’t forgot it.
You must enter a new numeric PIN from 4to 8digits to continue.
New PIN:
Verify PIN:
POST https://vpn.example.org/+webvpn+/login/userpin.html
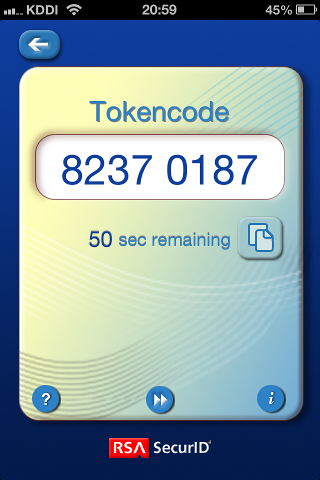
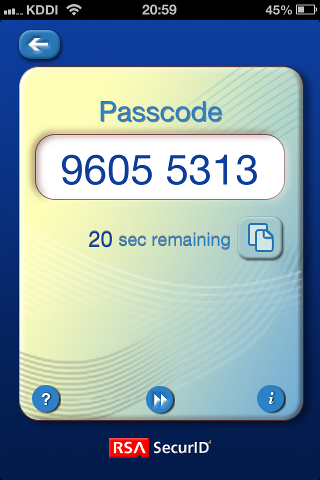
Enter PIN code in RSA token. Enter pass code as follows, so you can connected.


Enter new PIN with the next card code to complete authentication.
PASSCODE:
POST https://vpn.example.org/+webvpn+/login/challenge.html
Got CONNECT response: HTTP/1.1 200 OK
CSTP connected. DPD 30, Keepalive 20
Connected tun1 as 192.0.2.10 + 2001:0db8::10, using SSL
DTLS handshake failed: 2
DTLS handshake failed: 2
(snip)
If you failed authentication after you have change PIN code
If you fail next prompt, then you will not be able to authenticate.
Enter new PIN with the next card code to complete authentication.
PASSCODE:
Please request to administrator to reset your PIN code.